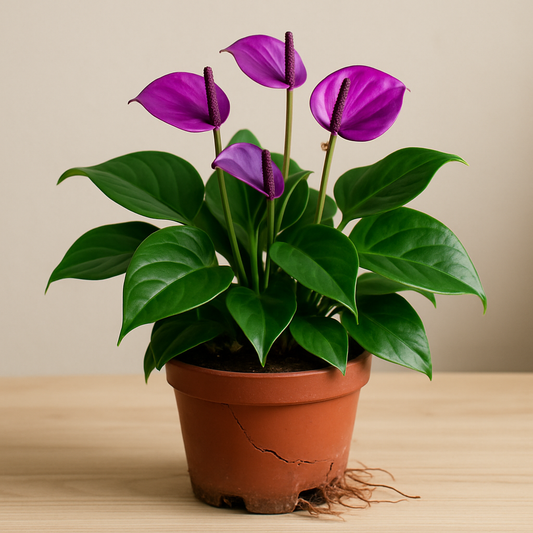

Why Addressing a Root-Bound Anthurium Purple Is Crucial
If you’re a proud owner of an Anthurium Purple, you know how its stunning blooms and glossy, unique foliage can elevate any indoor space. This tropical houseplant, cherished for its vibrant colors, is a favorite among plant enthusiasts. However, even the most striking Anthurium Purple can face serious challenges if it becomes root bound. This condition, where the roots outgrow their container, can harm or even kill your beloved plant if left unaddressed (source).
In this comprehensive guide, we’ll walk you through everything you need to know about identifying a root-bound Anthurium Purple, the step-by-step process of repotting, and essential aftercare tips to revive your plant. Whether you’re a seasoned gardener or a beginner, this actionable guide will help you restore your plant’s health and keep those vibrant blooms thriving.
A plant is considered root bound when its roots have outgrown the space in their container, often circling around the pot or pushing out through drainage holes. This creates a tangled, crowded root system that struggles to absorb water and nutrients effectively (source). For an Anthurium Purple, while a bit of root crowding is tolerable and even preferred, severe root binding can lead to significant stress and decline if not addressed (source). The urgency to act cannot be overstated. A severely root-bound Anthurium Purple may stop growing, show signs of distress, or even die if the issue isn’t resolved promptly. Understanding this condition is the first step to ensuring your plant’s long-term health.What Does It Mean for an Anthurium Purple to Be Root Bound?
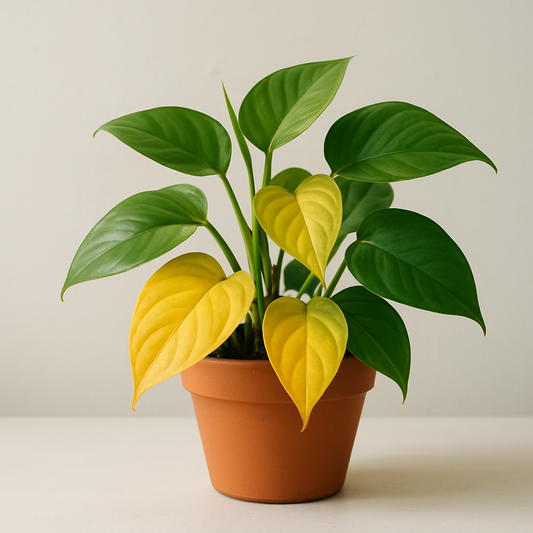
Recognizing the symptoms of a root-bound plant is crucial for timely intervention. Here are the key signs to watch for in your Anthurium Purple: Additionally, look for secondary symptoms like yellowing leaves, a lack of new growth, or the need for frequent watering, as these can also signal root-related distress (source). If you spot any of these signs, don’t delay—repotting is essential to prevent long-term damage to your plant.Signs Your Anthurium Purple Is Root Bound
Unlike some houseplants that require regular repotting, an Anthurium Purple doesn’t need frequent container changes. In fact, these plants often thrive when slightly root bound. However, repotting becomes necessary when the roots are severely crowded or the plant shows visible signs of decline (source). Another trigger for repotting is the age of the potting mix. If the soil in your plant’s container is more than 2–3 years old, it may have lost essential nutrients and accumulated harmful mineral salts. Repotting at this stage refreshes the plant’s environment and supports continued growth (source). Acting proactively can prevent minor issues from escalating into major problems.When Should You Repot Your Anthurium Purple?
Repotting is the most effective solution for a root-bound Anthurium Purple. While the process may seem daunting, taking the right steps and preparing adequately can minimize stress on the plant and set it up for a healthy recovery. Below, we break down the entire repotting process into manageable steps to ensure success.How to Repot a Root-Bound Anthurium Purple: Step-by-Step Guide
Before you begin, ensure you have all necessary materials on hand. One of the most critical decisions is pot selection. Choose a new pot that is only 1–2 inches larger in diameter than the current one. A pot that’s too large can retain excess moisture, increasing the risk of overwatering and root rot (source). Opt for a pot with adequate drainage holes to prevent water from pooling at the bottom. This simple choice can make a significant difference in maintaining a balanced environment for your Anthurium Purple’s roots post-repotting.Step 1: Gather Materials and Choose the Right Pot
The right soil mix is vital for your Anthurium Purple’s recovery and long-term health. Anthuriums require a light, loose, and well-draining potting mix with a pH around 6.5. This ensures that water and air can move freely around the roots, preventing issues like rot (source). Consider using a mix of two parts orchid mix, one part peat, and one part perlite, or an equal blend of peat, pine bark, and perlite. Both options provide excellent drainage and aeration, supporting root recovery after repotting (source).Step 2: Prepare the Right Soil Mix
Preparation can significantly reduce stress on your Anthurium Purple during repotting. Start by watering the plant a few hours before you plan to repot it. Moist roots are less likely to break or suffer damage during the transition (source). Set up a clean workspace with all your tools ready, including sterilized shears for trimming roots if needed, the new pot, and the prepared soil mix. Having everything organized will make the process smoother and quicker for both you and your plant.Step 3: Pre-Repotting Preparation
Now it’s time to repot your Anthurium Purple. Follow these steps carefully to minimize stress on the plant:Step 4: Repotting Process
Repotting can be a stressful experience for your Anthurium Purple, often leading to a phenomenon known as transplant shock. Proper aftercare is essential to help your plant recover and thrive in its new environment. Below, we outline immediate and long-term care strategies to ensure success.Aftercare Tips for Your Repotted Anthurium Purple
Right after repotting, place your Anthurium Purple in a shady area for a few days. This reduced light exposure helps the plant recover from the stress of the transition (source; source). Keep an eye on the plant for signs of wilting, which is a normal reaction to repotting. However, if you notice severe decline or persistent issues, reevaluate watering and light conditions (source). Also, avoid fertilizing for at least two months to prevent additional stress on the recovering roots (source).Immediate Post-Repotting Care
Once your Anthurium Purple shows signs of recovery, such as new growth or perked-up leaves, you can resume its regular care routine. Water consistently but avoid overwatering—allow the top inch of soil to dry out between sessions. Ensure the plant receives bright, indirect light and maintains high humidity, conditions ideal for an Anthurium Purple to flourish.Long-Term Care After Repotting
If your Anthurium Purple has become leggy with tall, bare stems, repotting alone may not address the structural issues. In such cases, consider taking stem cuttings as an alternative or complementary solution. Anthuriums root readily from cuttings, allowing you to propagate new plants and rejuvenate the original (source). This approach can breathe new life into an otherwise struggling plant, giving you the chance to enjoy multiple thriving Anthurium Purples in your collection. It’s a great option if repotting doesn’t fully resolve the plant’s appearance or health issues.Alternative Solution for Leggy Anthurium Purple Plants
Addressing a root-bound Anthurium Purple promptly is key to restoring its health and ensuring it continues to dazzle with its vibrant blooms. By recognizing the signs of root crowding, using the right soil mix and pot during repotting, and providing thoughtful aftercare, you can give your plant a fresh start. Regularly monitor your Anthurium Purple’s condition and act quickly at the first signs of distress to prevent future issues. We’d love to hear about your experiences! Have you repotted an Anthurium Purple before? Do you have additional questions or tips to share? Drop a comment below and join the conversation!Reviving Your Anthurium Purple with Proper Repotting